Showing posts with label diy bride. Show all posts

Thursday, January 3, 2013

DIY Coffee Cup Sleeve for Brides

Happy New Year dear DIY bloggers and followers! 2013 will be BellesOfBeirut's 3d year and i started feeling the pressure to reinvent myself with new ideas and crafts , could there be a writer's block for crafty people? ? ? I'll just have to wait and see

With this post , im actually cheating because it's something i made for my wedding in 2012 but was so busy with Christmas celebrations that i forgot to share it with you! So here goes . . .

Most of my married friends advised that i should keep sipping coffee to help me overcome sleep deprivation symptoms but when i woke at 5 am full of energy and buzzing with excitement, my mother advised that i should go for Chamomile tea instead  :) Wether a caffeine drink or herbal tea, i didn't want to carry a cup , it was the Bride's cup , it has to be special. Its her wedding day!

What you'll need :

  • Coffee paper cup with a sleeve. The one you can get at any coffee chain like Starbucks  or Tim Hortons
  • Graphic or colored paper
  • Colored pen
  • Pencil , scissors and glue


Raquel S.


Pin It

Monday, December 10, 2012

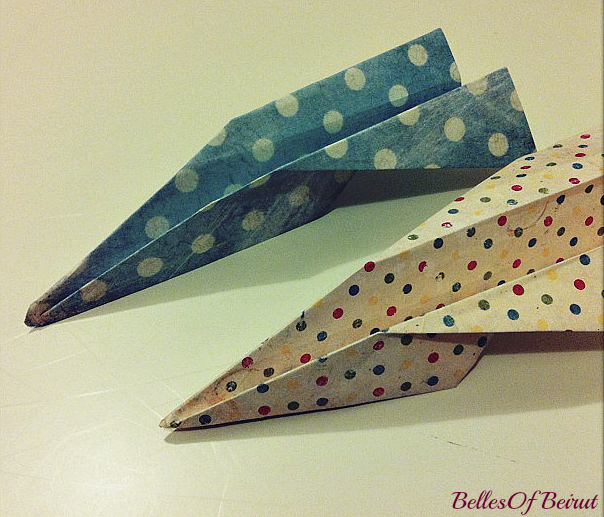
DIY Couple Photo Shoot Props

I love wedding and engagement photo shoot props especially when they are personalized to the couple's character. So when it was our turn to get married i got to the table and crafted dozens of props. You probably won't end up using them all but having a variety of options will give your photographer plenty of room to work their magic.

Our theme was back-to-school so i made these cool cootie catchers and paper planes. All you need is paper , the more colorful the merrier!


For those that grew up too fast and forgot how to make them, these cootie catcher tutorial and paper plane tutorial will come in handy


Here are some of the pictures by our wedding photographer extraordinaire Joe Chedrawi !


Raquel S.


Pin It

Monday, December 3, 2012

DIY Tea Bag Favor

If you started crafting and looking for a simple , quick and fuss free project , try making your own tea bag labels. 

For my hen's night, my amazing friends planned the most fabulous tea party . . . . with a spin. Basically no tea was served that day just lots of colorful cocktails :) However to stay in the spirit of the theme, i made small tea bag favors for my guests .

What i used :
1- Tea Bags
2- Tea pot shaped plates
3- Small paper envelopes
4- Glitter paper 
5- Heart puncher


Start by punching hearts out, i chose both purple and gold glitter paper


Glue the heart to the tea bag , allow it to dry properly

I used graphic tape to cover the glue

Voila! The tea bags are done!

Finally , I placed the plate and tea bag in the envelopes and signed them off with more hearts

Some pictures from that day :

My lovely DIY favor table set up by Mirna, Tsolaire and Christina

DIY bracelets out of lace and flowers. They know me too well

A DIY pink and white paper wedding dress just for me 

Raquel S.


Pin It

Monday, November 26, 2012

DIY Bridal Ribbon Bouquet

Belles Of Beirut is back! It feels like a  part of me is alive again :) If you're wondering, I've been out for good and happy reason, i got married and went away on a long and charming honeymoon to Italy ...  And now that this stage of my life is over , i can't wait to show you what I've been up to while preparing for the big day

If you're a bride-to-be or know someone who's engaged to be married, make sure you do something personalized whether big or small , it makes all the difference. I'll be posting some pictures from the wedding once the professional pictures are out to show you how my friends at Cherry On Top Events turned my ideas into reality.

Once we set the date , the first thing i started thinking of was the bouquet. Many brides obsess over the perfect dress and with good reason but a statement bouquet has a aura of its own. I thought of what flower i loved the most and trust me i researched plenty only to realize that i didn't have one . My passion was for ribbons and that's how my bouquet came to be. 


 Roula , my wedding planner helped me find these ribbons. We went for different fabrics , colors , sizes and for those who know me well, plenty of lace

Lay the ribbons piece by piece and fold them in 2 , they don't have to be even or symmetrical . Let is look as if you just picked up a pile of ribbons

Once done, fix the folds so that the ribbons are not bent then get someone to help you tie them at the neck. Use a thin ribbon to secure and make sure the bouquet is not too heavy!

Your bouquet will last forever 

Raquel S.

Pin It